如何使用x402支付协议实现加密货币付费墙
- QuickNode
- 发布于 2025-05-21 18:40
- 阅读 4151
本文介绍了x402协议,这是一种利用HTTP 402状态码实现互联网原生支付的开放协议。文章讲解了如何通过构建一个简单的HTML/JS Web应用和Express后端,在Base Sepolia测试网上以卖家和买家的身份使用x402,来实现内容付费墙,并允许用户使用加密货币支付。同时,文章也介绍了x402的核心组件、支付流程以及实际应用场景。
概述
x402 是一个互联网原生支付的开放协议,它利用 HTTP 402 "Payment Required" 状态码。有了 x402,你可以在 API 请求、网页等后面实现付费墙,而无需传统信用卡处理、KYC 和高额交易费用带来的摩擦。
在本指南中,你将通过构建一个简单的 HTML/JS Web 应用程序(使用 Express 作为后端)来保护付费墙后面的内容,并允许用户在测试网上使用加密货币支付,从而在 Base Sepolia 测试网上将 x402 用作卖家和买家。
让我们开始吧!
你将要做什么
- 了解 x402 及其工作原理
- 设置一个带有 x402 集成的 HTML/JS Web 应用程序,该应用具有 Express 服务器
- 在带有 Base Sepolia 的本地环境中测试 Web 应用程序
你所需要的
- 对编程和区块链概念的基本理解
- 安装 Node.js (v22+)
- 一个与 EVM 兼容的钱包,其中包含 Base Sepolia 区块链上的 ETH 和 USDC
什么是 x402?
x402 是一个围绕 HTTP 402 Payment Required 状态码构建的链无关协议,它使服务能够直接通过 HTTP 收取对其 API 和内容的访问费用。这种开放支付标准允许客户端以编程方式为资源付费,而无需帐户、会话或凭据管理。有了 x402,任何 Web 服务都可以在提供响应之前要求付款,从而使用加密原生支付来提高速度和隐私。
x402 适用于谁?
- 卖家:希望通过其 API 或内容获利的服务提供商。x402 支持来自客户端的直接、编程化支付,且设置最少。
- 买家:寻求访问付费服务而无需帐户或手动支付流程的开发人员和 AI 代理。
卖家和买家都通过 HTTP 请求直接交互,支付通过协议透明地处理。
x402 的核心组件
客户端/服务器架构
客户端角色(买家)
- 发起请求以访问付费资源
- 处理 402 响应并提取支付详细信息
- 使用 X-PAYMENT 标头提交付款
服务器角色(卖家)
- 使用 HTTP 402 响应定义支付要求
- 验证传入的支付负载
- 确认付款后提供请求的资源
促成者 (Facilitators)
促成者通过以下方式简化支付流程:
- 验证支付负载
- 为服务器在区块链上结算付款
- 无需服务器来实现复杂的区块链交互
拥有促成者是可选的,但建议使用一个。目前,Coinbase 开发者平台 (CDP) 托管了主要的促成者,在 Base 主网上提供免手续费的 USDC 结算。
x402 支付流程
x402 协议利用 ERC-3009 TransferWithAuthorization 标准来实现无 Gas 费用转账,这是无摩擦 Web3 货币化的关键组成部分。让我们介绍一下使用 x402 的流程以及符合该标准的规范。
- 客户端从服务器请求资源
- 服务器响应 402 Payment Required 和支付说明:
{
  "maxAmountRequired": "0.10",
  "resource": "/api/market-data",
  "description": "Access requires payment",
  "payTo": "0xABCDEF1234567890ABCDEF1234567890ABCDEF12",
  "asset": "0xA0b86991C6218b36c1d19D4a2e9Eb0cE3606EB48",
  "network": "ethereum-mainnet"
}
- 客户端根据要求准备付款
- 客户端使用包含签名的负载的 X-PAYMENT 标头重试
- 服务器通过促成者验证付款
- 服务器在区块链上结算付款
- 服务器在确认付款后交付资源
现在我们已经很好地了解了 x402 是什么以及它在底层是如何工作的,让我们继续构建一个简单的 x402 演示。但是,我们首先需要满足一些项目先决条件,但是如果你的 Base Sepolia 上已经有 ETH 和 RPC 端点,请随时跳到项目设置部分。
项目先决条件:在 Base Sepolia 上检索 USDC
你需要在 Base Sepolia 上拥有一些 USDC 才能演示一个简单的 x402 支付。
要检索 USDC,请导航到 Circle USDC faucet 并请求一些资金。在 Base Sepolia 上拥有 USDC 后,你可以继续下一步。
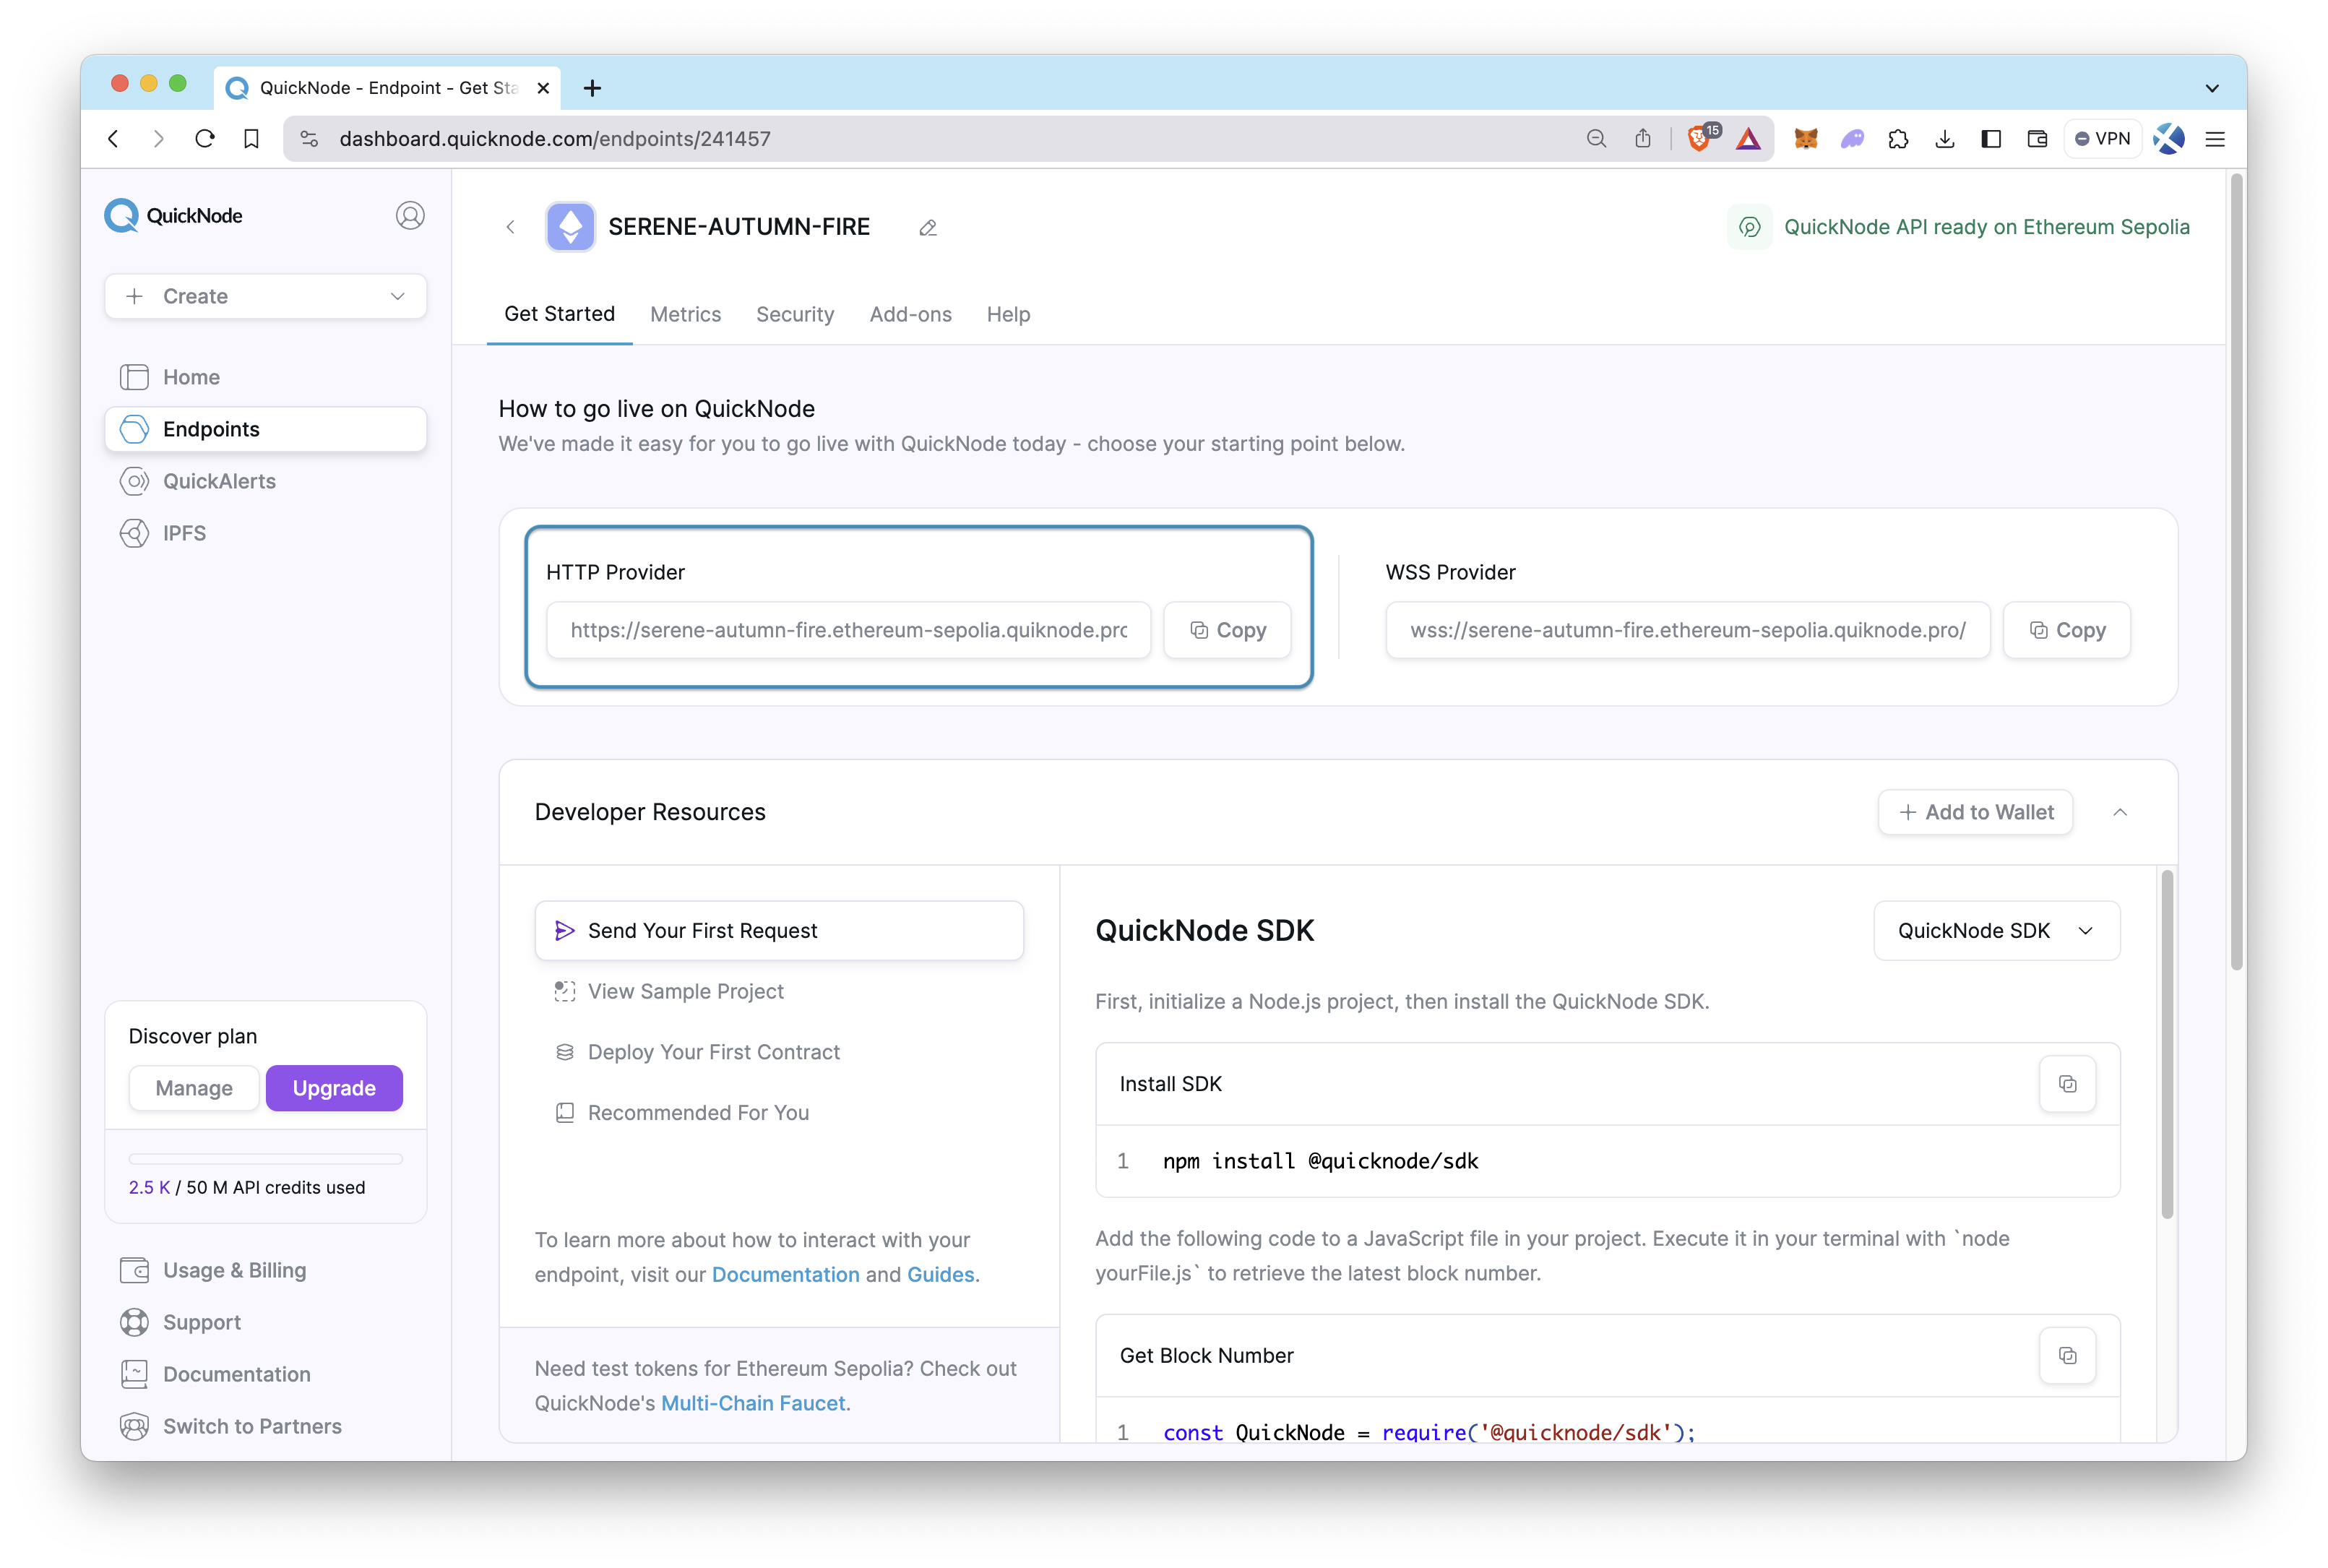
项目先决条件:QuickNode Base 端点
要与 Base Sepolia 交互,你需要一个 API 端点才能与网络通信。欢迎使用公共节点或部署和管理自己的基础设施;但是,如果你想要更快的响应时间,可以将繁重的工作留给我们。在此处注册一个免费帐户here。
登录 QuickNode 后,单击创建端点按钮,然后选择 Base 链和 Sepolia 网络。创建端点后,复制 HTTP Provider link,并将其作为 Base Sepolia 区块链添加到你的 Web3 钱包的 RPC 设置中。
项目设置
在满足先决条件后,让我们进入项目设置。我们将在本指南中构建的演示将执行以下操作:
- 允许用户连接他们的钱包并签署一条消息,该消息将用于验证付款
- 然后,服务器将验证是否满足 402 状态代码,并且
- 响应带有付费墙的 API 请求或网页
让我们开始吧!
克隆存储库
git clone git@github.com:quiknode-labs/qn-guide-examples.git
安装依赖项
然后,导航到项目文件夹中并安装依赖项:
cd sample-apps/coinbase-x402
npm install
配置环境
cp .env.local .env
接下来,打开 .env 文件,并确保你输入了接收付款的钱包地址和其他环境变量:
## 接收钱包地址(将发送付款的地址)
WALLET_ADDRESS=在此处输入_WALLET_ADDRESS

## 环境
NODE_ENV=development

## 服务器端口(默认:4021)
PORT=4021
保存文件。
现在,让我们进入代码库的逻辑。
服务器设置
我们将使用 Express 来创建一个简单的服务器,该服务器将处理付款和 API 请求。
打开 server.js 文件,让我们回顾一下该文件的逻辑。
import express from "express";
import { paymentMiddleware } from "x402-express";
import { facilitator } from "@coinbase/x402"; // For mainnet
import dotenv from "dotenv";
import path from "path";
import { log } from "./utils/log.js";
import { videoAccessHandler } from "./handlers/videoAccessHandler.js";

dotenv.config();

const app = express();

// Use Base Sepolia (testnet) for development
const network = "base-sepolia";
const facilitatorObj = { url: "https://x402.org/facilitator" };

// Serve static files from the public directory
app.use(express.static(path.join(process.cwd(), "public")));

app.use(express.json());

// x402 payment middleware configuration
app.use(
  paymentMiddleware(
    process.env.WALLET_ADDRESS, // your receiving wallet address
    {
      // Protected endpoint for authentication
      "GET /authenticate": {
        price: "$0.10", // Set your desired price
        network: network,
      },
    },
    facilitatorObj
  )
);

// Add request logging middleware
app.use((req, res, next) => {
  const start = Date.now();
  log(`${req.method} ${req.url}`);
  log(`Request Headers: ${JSON.stringify(req.headers)}`);
  res.on("finish", () => {
    const duration = Date.now() - start;
    log(`${req.method} ${req.url} - ${res.statusCode} (${duration}ms)`);
  });
  next();
});

// Authentication endpoint - just redirects to the authenticated content
app.get("/authenticate", (req, res) => {
  log("Payment successful, redirecting to video content");
  res.redirect("/video-content");
});

// Video content endpoint - serves the authenticated content
app.get("/video-content", videoAccessHandler);

// Serve the home page
app.get("/", (req, res) => {
  res.sendFile(path.join(process.cwd(), "public", "index.html"));
});

export default app;

// This block runs the server locally
if (process.env.NODE_ENV !== "production") {
  const PORT = process.env.PORT || 4021;
  app.listen(PORT, () => {
    console.log(`Server listening at http://localhost:${PORT}`);
  });
}
客户端设置
现在,我们将建立客户端(我们的前端),我们需要在项目的 public 目录中建立三个页面:
index.html: 主页authenticate.html: 验证和付款video-content.html提供付费墙视频内容的页面
让我们深入研究每一个。首先,让我们查看一下起始页文件(index.html):
<!DOCTYPE html>
<html lang="en">
<head>
  <meta charset="UTF-8">
  <meta name="viewport" content="width=device-width, initial-scale=1.0">
  <title>x402 Video Paywall Demo</title>
  <link rel="stylesheet" href="style.css">
</head>
<body>
  <header>
    <h1>x402 Video Paywall Demo</h1>
    <p>Ready to access premium content with <a href="https://www.x402.org/" target="_blank">x402 payment</a> protocol.</p>
  </header>

  <div class="card">
    <h3>Premium Video Content</h3>
    <p>Access our premium video content for just $0.10 in USDC:</p>
    <a href="/authenticate" class="cta-button">Pay $0.10 to Access Video</a>
  </div>
</body>
</html>
上面的 HTML 是应用程序的主页,用户将首先看到它。
然后,是付款页面(即 authenticate.html):
<!DOCTYPE html>
<html lang="en">
<head>
  <meta charset="UTF-8">
  <meta name="viewport" content="width=device-width, initial-scale=1.0">
  <title>x402 Video Paywall Demo</title>
  <link rel="stylesheet" href="style.css">
</head>
<body>
  <header>
    <h1>x402 Video Paywall Demo</h1>
    <p>Processing your payment...</p>
  </header>

  <div class="card">
    <h3>Payment in Progress</h3>
    <div class="payment-processing">
      <div class="loader"></div>
      <p>Your payment is being processed. Please do not close this window.</p>
      <p>You will be automatically redirected to the video content once the payment is confirmed.</p>
    </div>
    <a href="/" class="cta-button secondary-button">Cancel Payment</a>
  </div>
</body>
</html>
我们还需要构建付费墙网页,除非用户成功提交付款并检索到成功的402状态代码响应,否则该网页不会显示。此逻辑将包含在 video-content.html 文件中,如下所示:
<!DOCTYPE html>
<html lang="en">
<head>
<meta charset="UTF-8">
<meta name="viewport" content="width=device-width, initial-scale=1.0">
<title>x402 Video Paywall Demo</title>
<link rel="stylesheet" href="style.css">
</head>
<body>
<header>
<h1>x402 Video Paywall Demo</h1>
</header>
<div class="card">
<h3>Premium Video Content</h3>
<div class="video-container">
<iframe
width="100%"
height="450"
src="https://www.youtube.com/embed/dQw4w9WgXcQ"
title="YouTube video player"
frameborder="0"
allow="accelerometer; autoplay; clipboard-write; encrypted-media; gyroscope; picture-in-picture"
allowfullscreen>
</iframe>
</div>
<br />
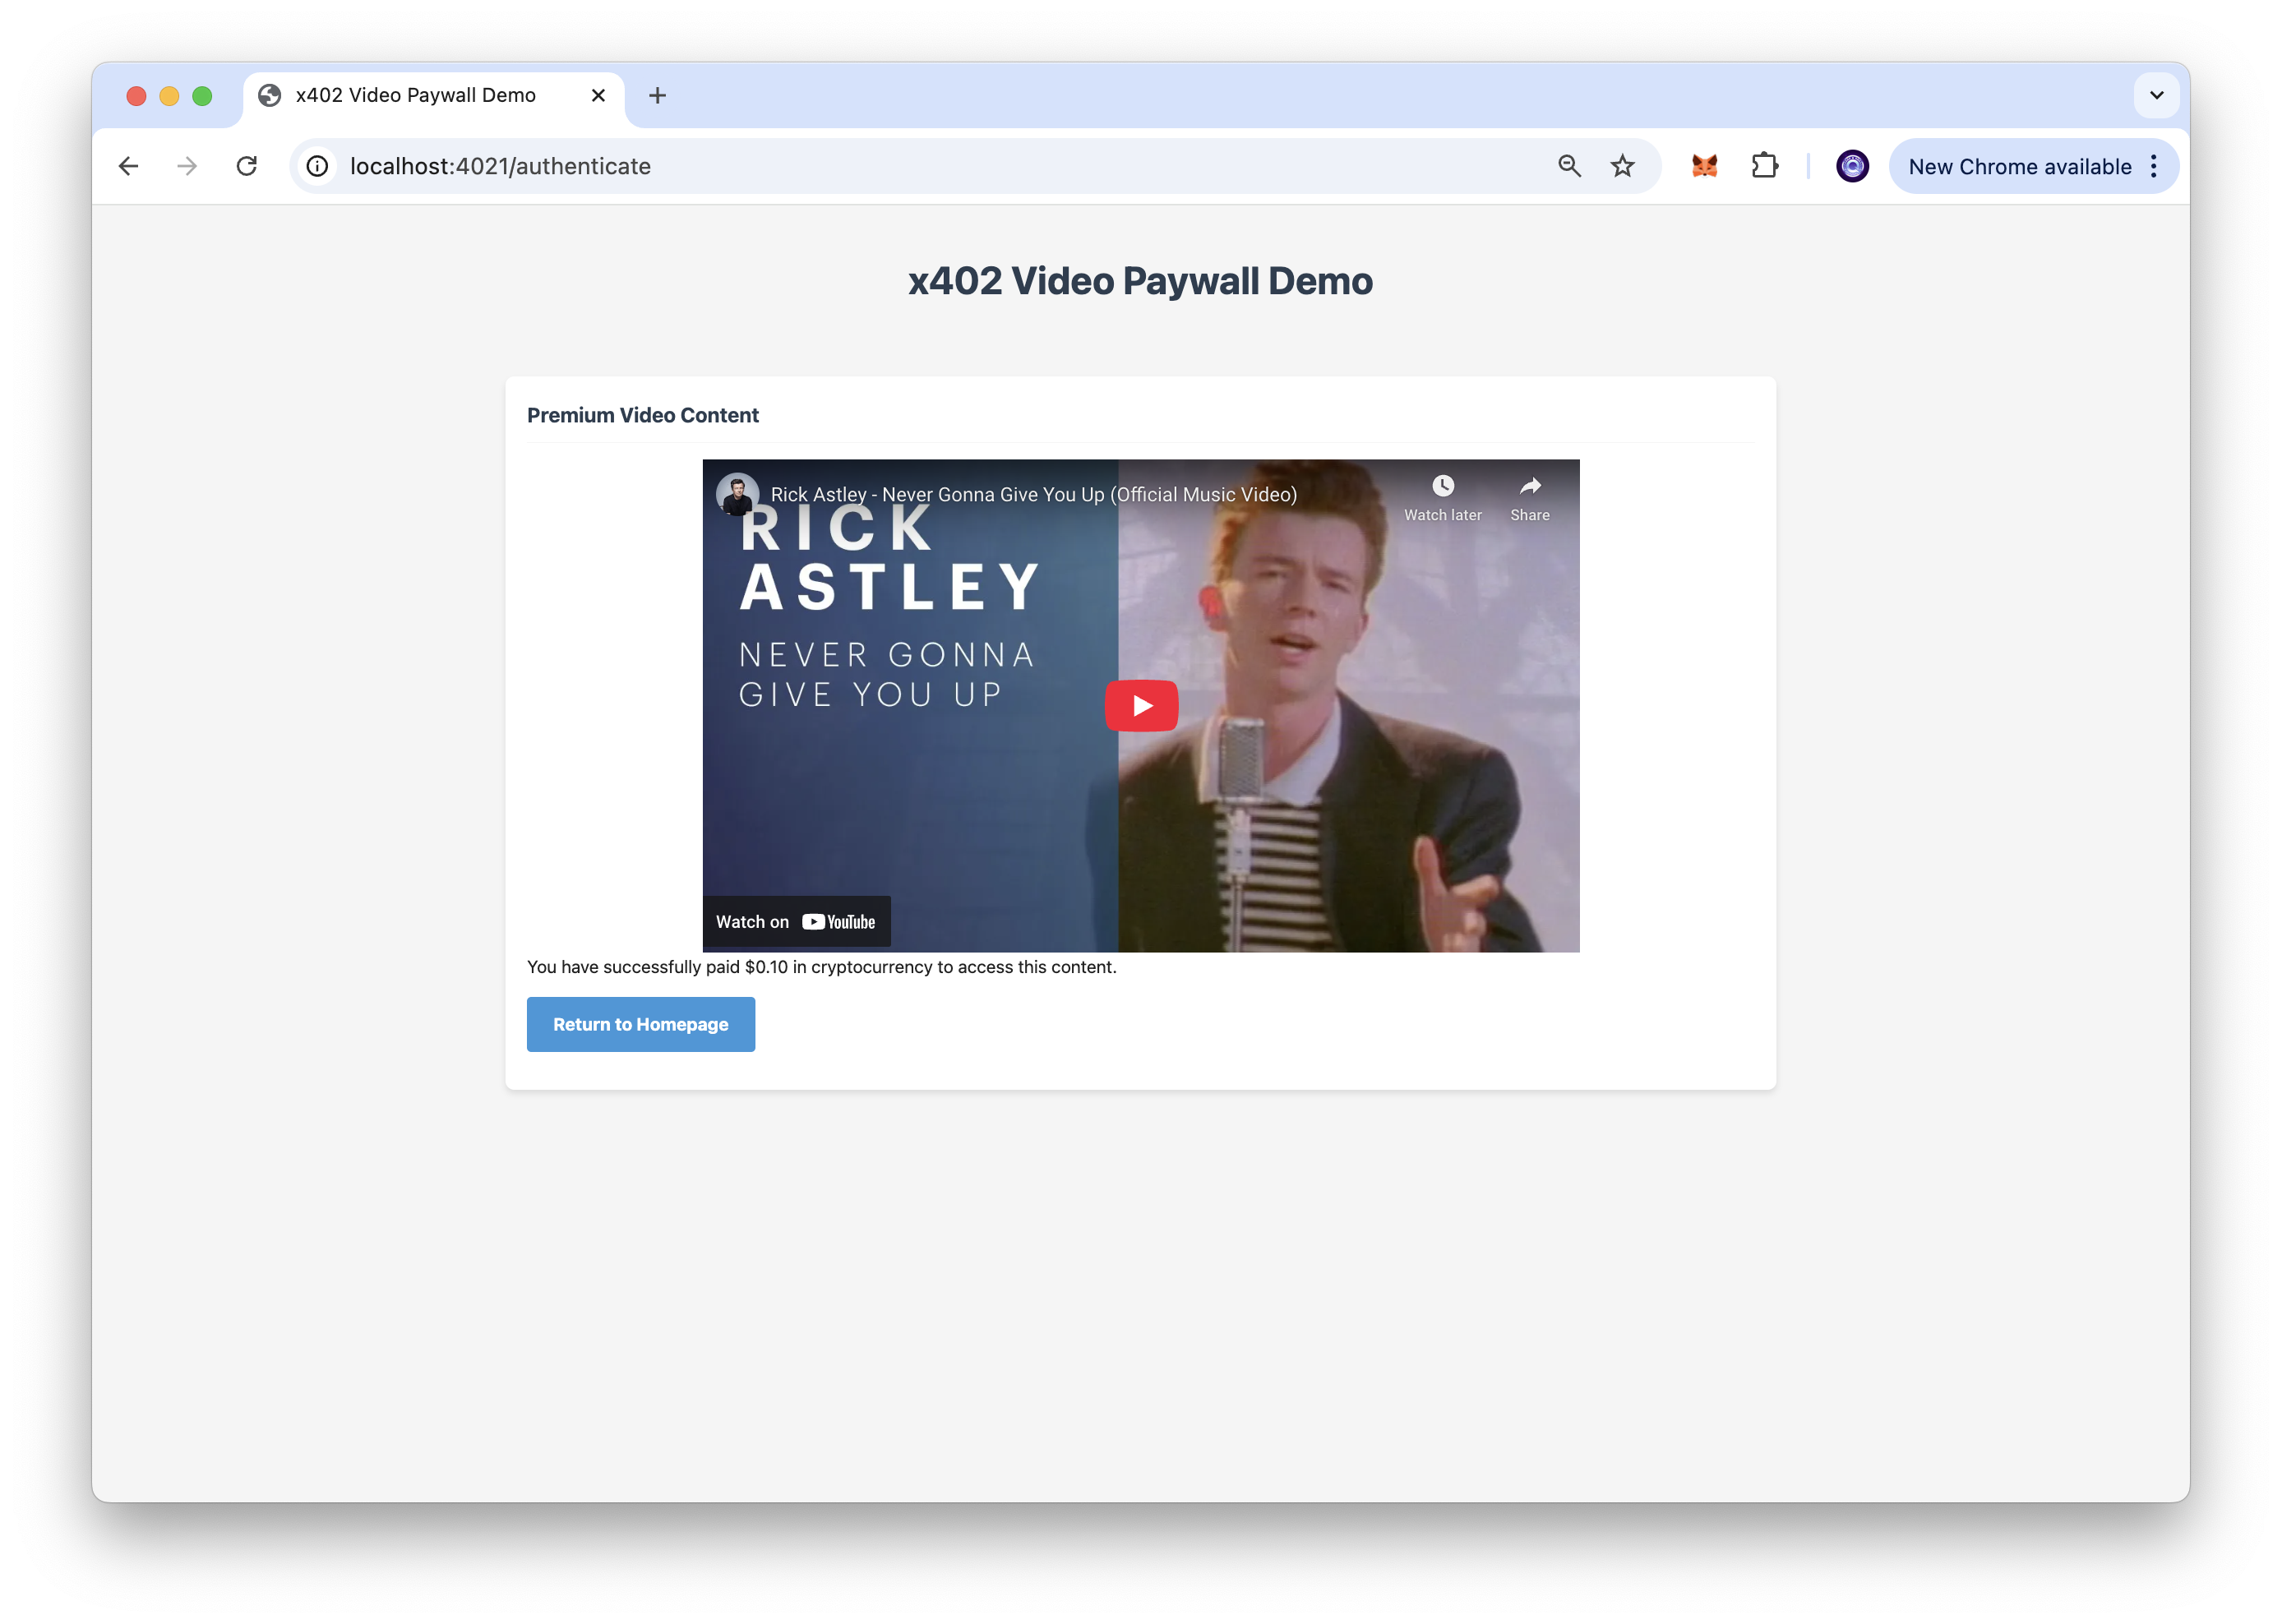
<p>You have successfully paid $0.10 in cryptocurrency to access this content.</p>
<a href="/" class="cta-button">Return to Homepage</a>
</div>
</body>
</html>
辅助函数
我们还需要创建一个辅助函数来处理视频页面。这将在 handlers/videoAccessHandler.js 文件中:
import { log } from "../utils/log.js";
import path from "path";

export function videoAccessHandler(req, res) {
  const startTime = Date.now();
  try {
    log("Processing video access request");

    // Send the video content page
    res.sendFile(path.join(process.cwd(), "public", "video-content.html"));

    log(`Request completed in ${Date.now() - startTime}ms`);
  } catch (error) {
    log("Error serving video content:", "error", error);
    res.status(500).send({
      error: "Failed to serve video content",
      message: error.message,
    });
  }
}
测试付费墙
在设置好后端和前端后,现在让我们尝试对其进行测试。通过在项目根文件夹中的终端窗口中运行以下命令来启动服务器:
node server.js
你会看到这样的页面:
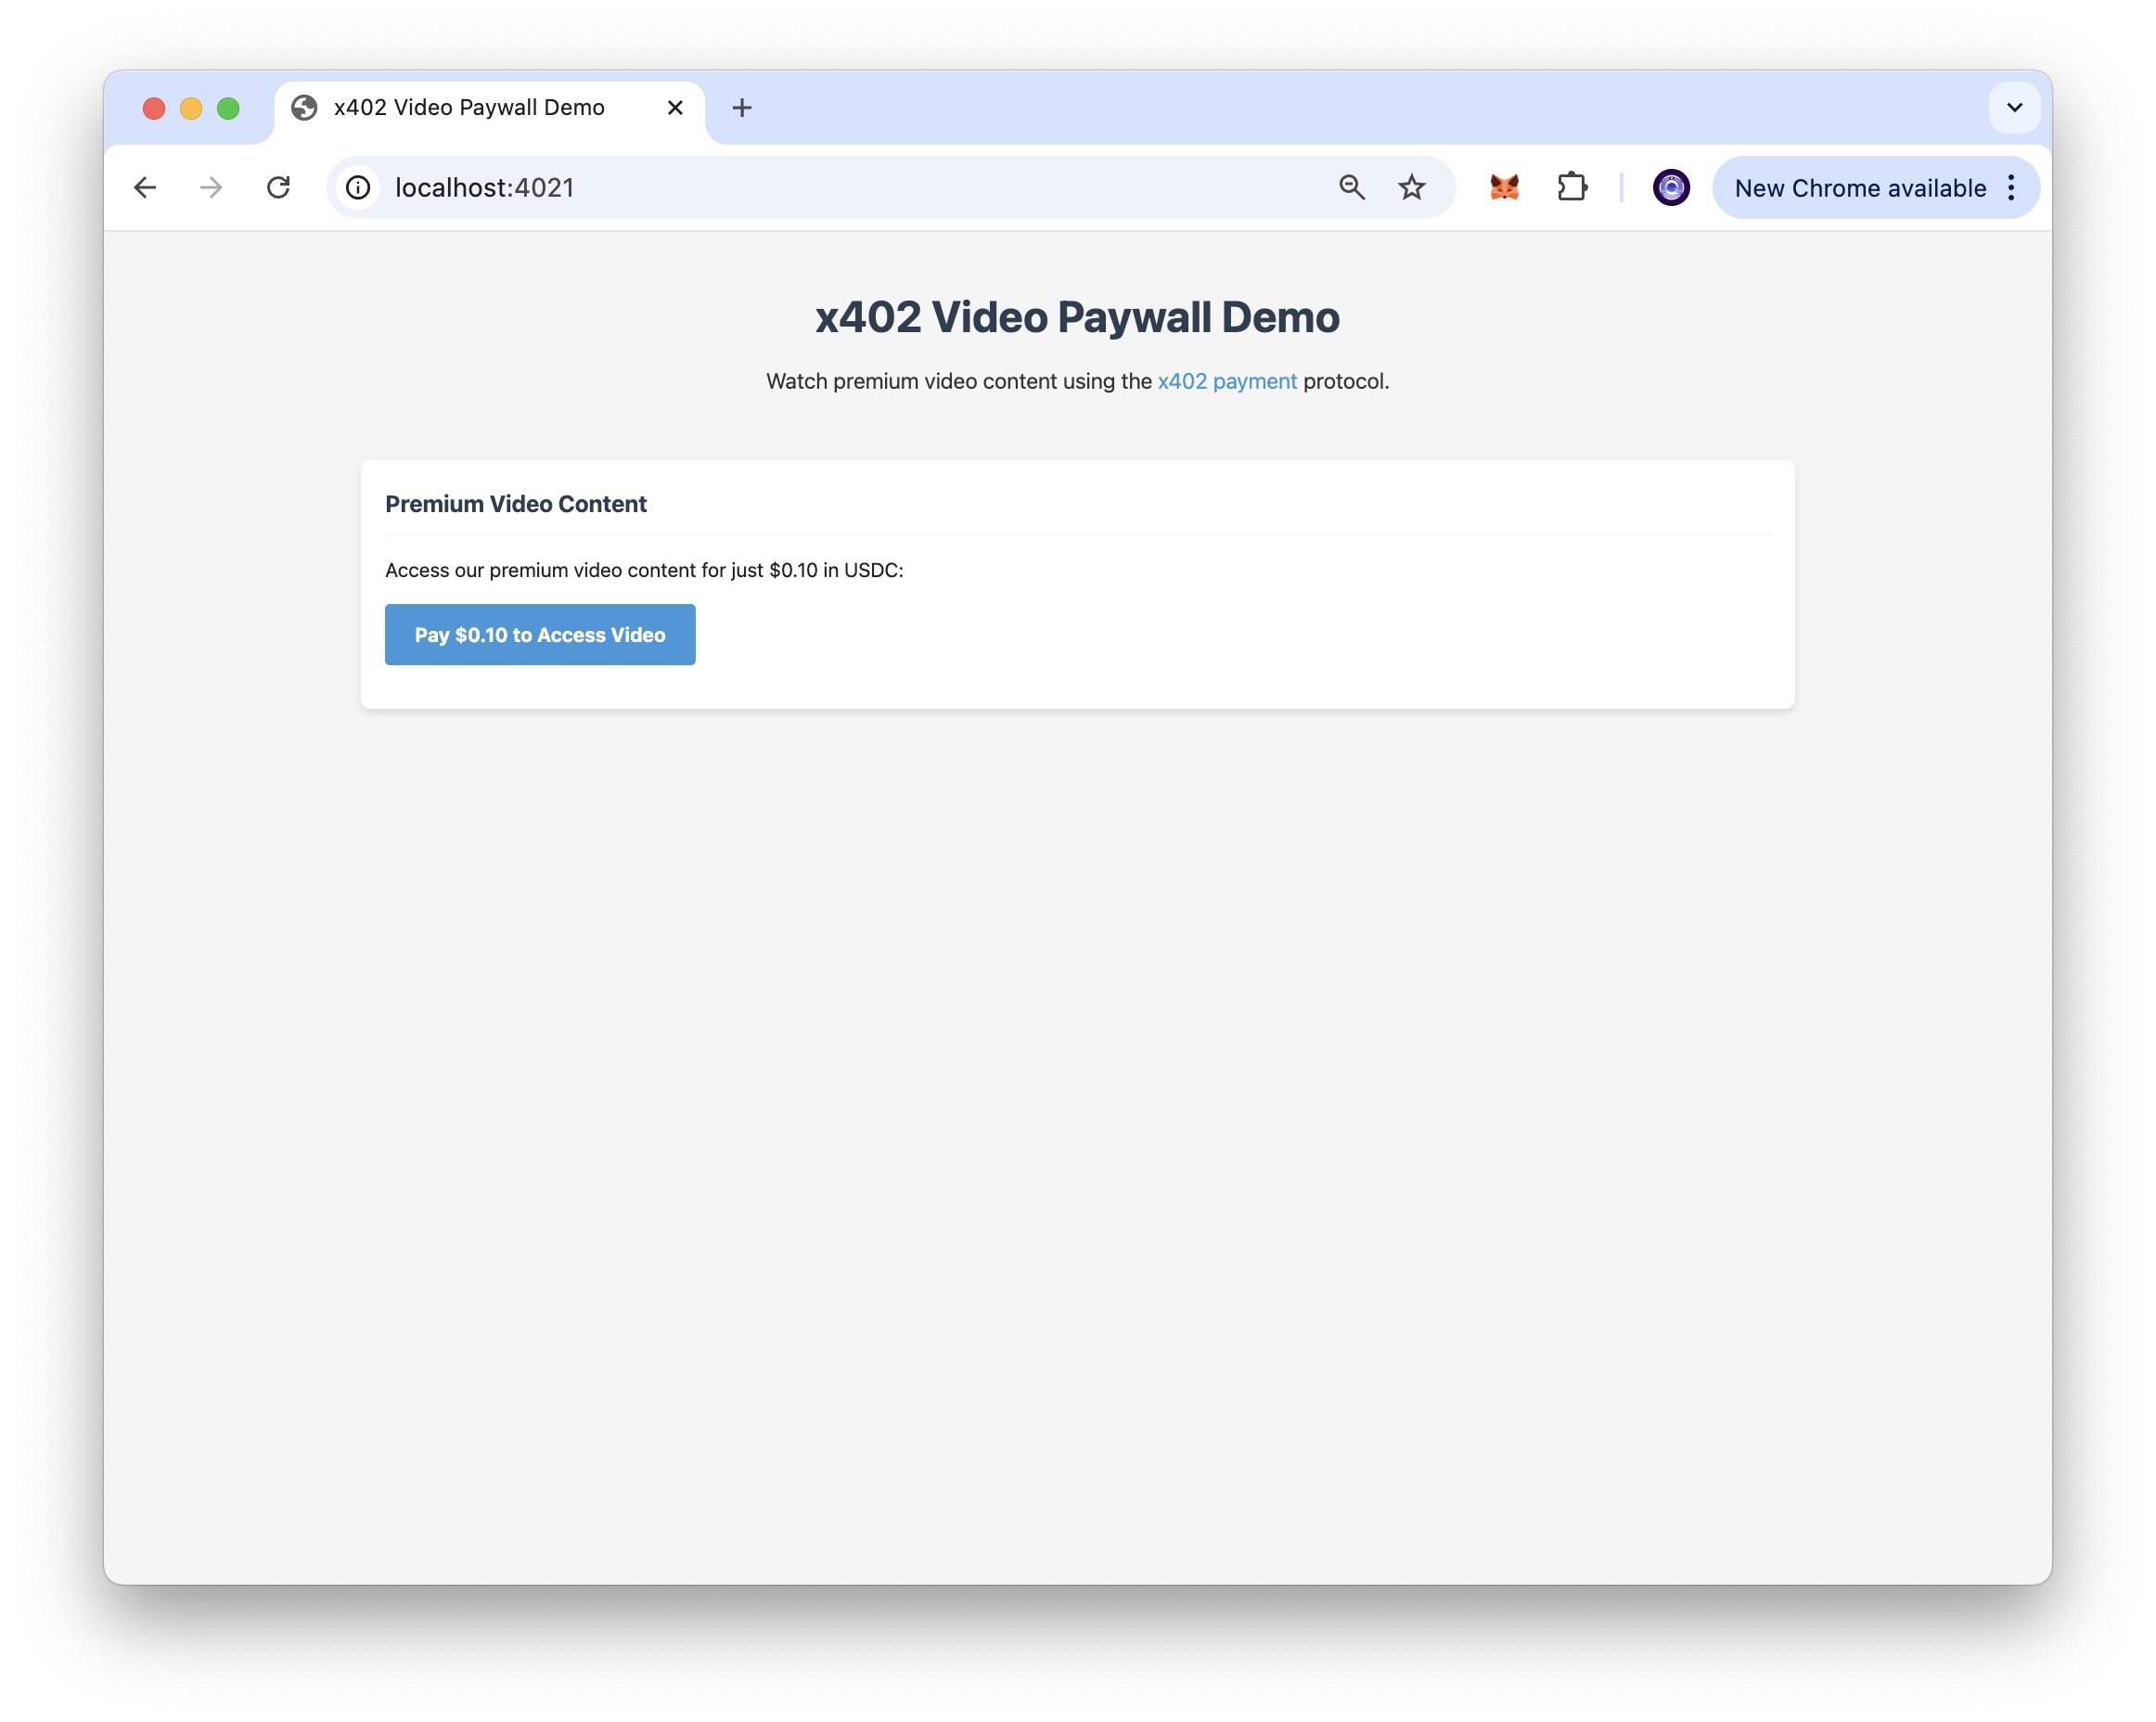
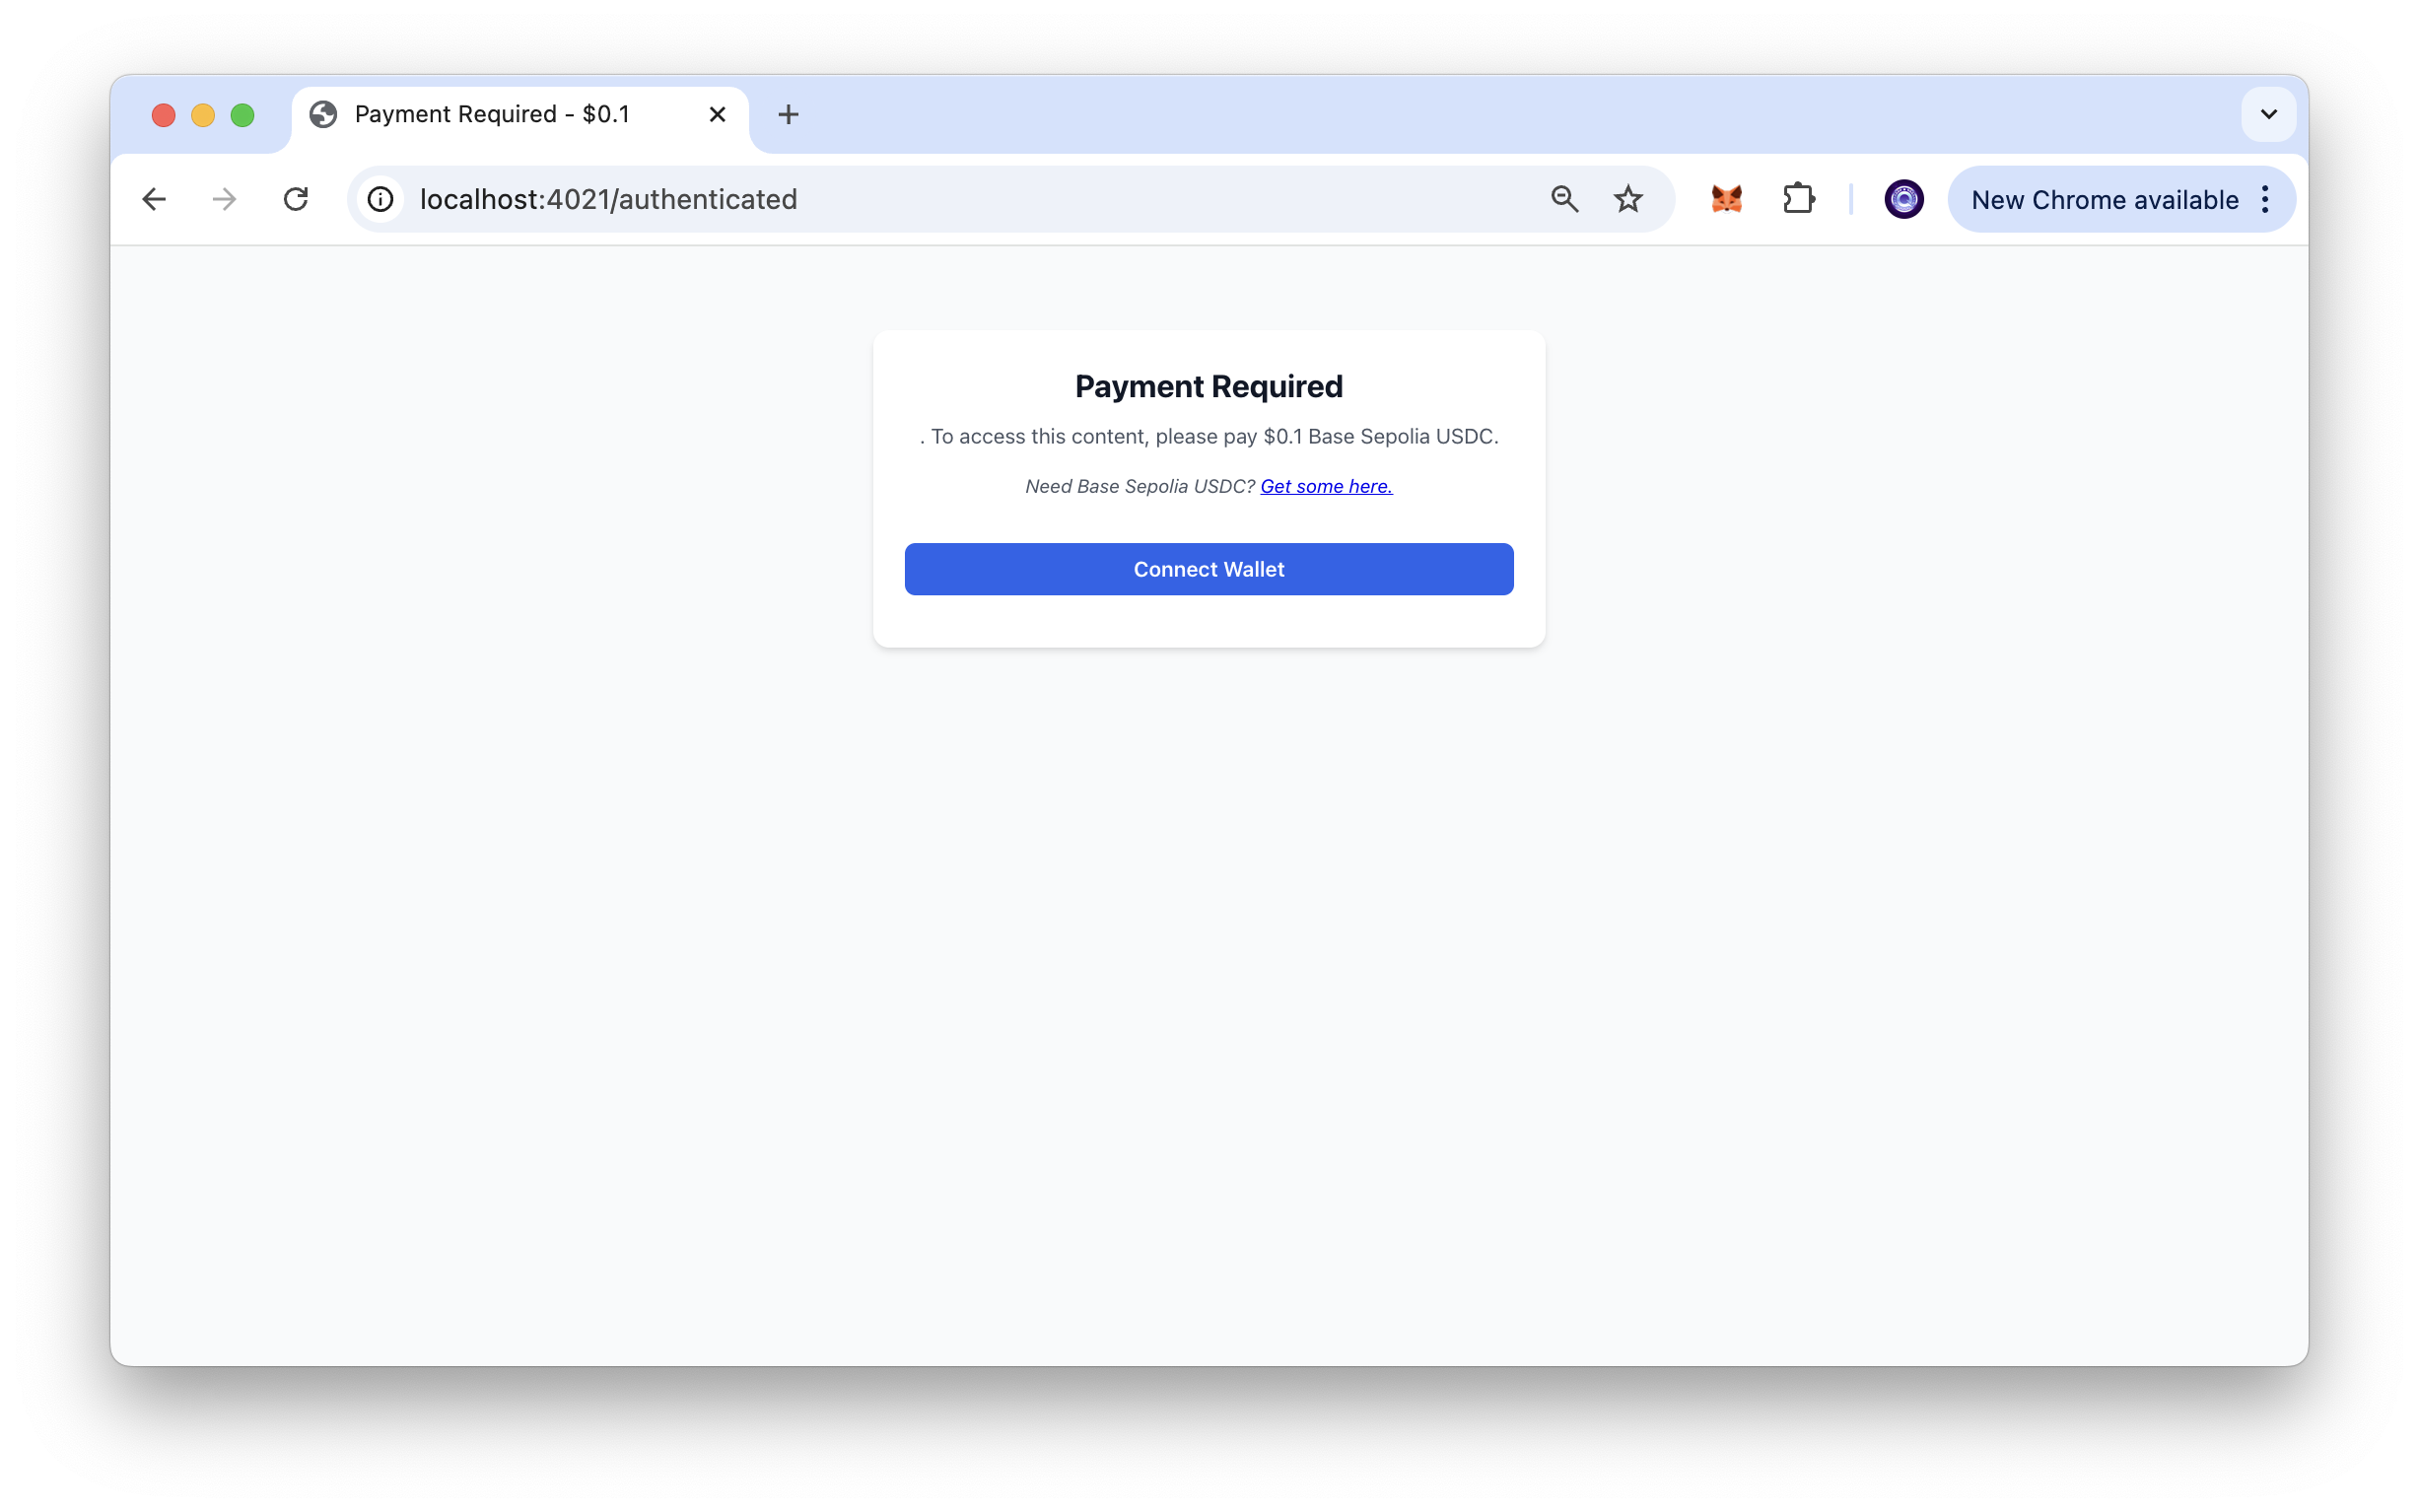
单击付款按钮,你将被转发到身份验证页面(例如,localhost:4021/authenticate),你需要在其中连接你的钱包并付款。
系统将提示你签名一条消息,例如下面的屏幕截图。你会注意到我们正在签名一条 TransferWithAuthorization 消息(在 ERC-3009 中实现),该消息允许通过委托给第三方 EOA 或智能合约进行无 Gas 费用转账。签名者授权从他们自己到另一方的资金转账。
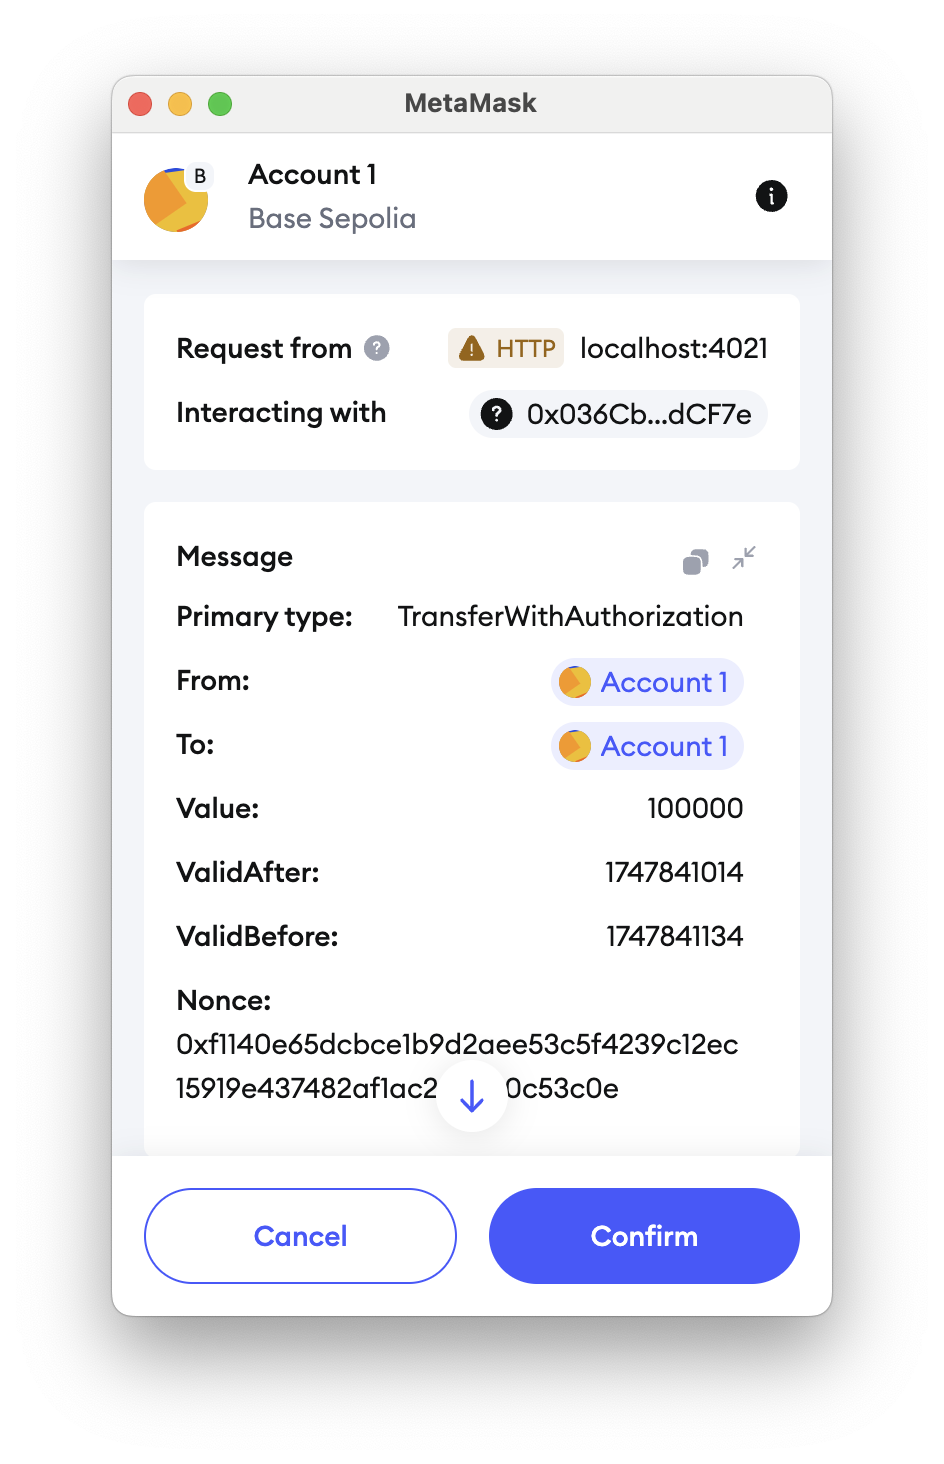
此签名消息包含转移所需的所有详细信息:
- 发送者地址
- 接收者地址
- 转账金额
- 有效时间窗口
- 一个唯一的 nonce 以防止重放攻击
一旦你在钱包中签名了消息,并且成功支付了 0.10 美元的 USDC,你将被重定向到付费视频页面:
更多用例
- 内容货币化:直接为单独的文章、视频或电子书章节赚钱,而无需订阅障碍。
- 即用即付服务:以精确的增量准确地支付你使用的内容,无论是 API 调用、云存储还是计算能力。
- 自动化服务付款:让你的软件或智能设备自动处理它们使用的服务的小额付款。
下一步
要基于你刚刚学到的知识进行构建,请尝试以下操作:
- 部署到实时服务器:超越本地环境,将演示托管在其他人可以访问的真实服务器上。
- 自定义支付金额:试验不同的价格点或根据内容价值实施动态定价。
- 实施限时访问:创建限时访问权限,其中付款将在特定时间内解锁内容。
- 连接到 Base 主网:准备就绪后,从 Sepolia 测试网转移到 Base 主网以进行实际实施。
最后的想法
就这样!你刚刚学习了如何使用 x402 在你的 Web 应用程序中实现互联网原生支付。通过利用 HTTP 402 "Payment Required" 状态代码和区块链,你创建了一个简化的支付系统,消除了传统的支付处理摩擦。
如果你遇到困难或有疑问,请将其放入我们的 Discord 中。通过在 Twitter (@QuickNode) 或我们的 Telegram 公告频道 上关注我们,及时了解最新信息。
我们 ❤️ 反馈!
如果你对新主题有任何反馈或要求,请告诉我们。我们很乐意听到你的来信。
- 原文链接: quicknode.com/guides/inf...
- 登链社区 AI 助手,为大家转译优秀英文文章,如有翻译不通的地方,还请包涵~


