使用 Node.js 和 Metaplex Umi 在 Solana 上创建 Token
- solana_dev_tips
- 发布于 2025-04-11 13:51
- 阅读 2969
本文介绍了如何使用 Metaplex Umi 和 Node.js 在 Solana Devnet 上免费创建自己的 token。文章详细阐述了安装必要的软件包、生成 Solana 钱包、上传图片和元数据到 Arweave,以及最终铸造自定义 token 的步骤,并提供了完整的代码示例和在 Mainnet 上线的注意事项。
使用 Metaplex Umi 和 Node.js 在 Solana devnet 上免费创建 Token。Solana 开发小技巧。
在 Solana 上创建你自己的 Token 听起来像是只有区块链专家才能做的事情——但有了 Metaplex Umi 和 Node.js,它出乎意料地顺畅且对初学者友好。
在本指南中, 将带你了解在 Solana Devnet 上开始试验你自己的自定义 Token 所需的一切。(并且稍后,在 mainnet-beta 上线)
无需事先的区块链开发经验——只需对如何运行命令和跟进代码有基本的了解即可。
⚠️ 你应该首先完成我的 Solana Dev Setup Guides 的 第一部分设置 (Solana CLI),因为我们将使用 CLI,所以你需要安装它。此外,第 2 部分 (Solana Javascript/Next.js) 可能也有用,尽管我也在本文中进行了 Typescript 安装,但并非严格要求。如果你完成了第2部分,你将获得更多。
✅ 在本文中,你将学习 如何安装正确的包,生成 Solana 钱包,将图像和元数据上传到 Arweave,最后铸造你的自定义 Token——所有这些都使用 JavaScript 和 Metaplex 工具。
我们将介绍每个步骤的含义以及它如何融入在链上启动 Token 的大局。无论你是构建严肃的东西还是只是为了学习而玩,这个过程都会让你 亲身体验如何在 Solana 上创建和管理 Token。
当很多人想到 Token 时,他们的想法是:“也许我可以启动一个并致富!” 嗯,也许吧,但知道如何做到这一点有很多用处…… 以下是一些用例 来创建你自己的 Token:
- 在 web3 游戏中表示游戏内货币 或物品。
- 使用它来 奖励 社区或应用程序中的 用户。
- 在忠诚度奖励或推荐系统中跟踪积分或信用。
- 尝试 memecoin 等品牌代币。
- 在 DAO 或项目中 分配治理权。
- 运行 Token 经济学和供应 方面的实验。
- *测试* 空投 或 赠品 的运作方式。
- 构建需要测试 Token 的演示应用程序或原型。
- 让用户使用你的 Token 在你的平台内进行打赏、支付或交易。
- 为 活动、商品或收藏品 创建 品牌 Token。
- 将 Token 连接到 Solana 程序或 Staking 机制。
正如你所看到的,知道如何创建 Token 非常有用。
如果你想更进一步,本教程也是一个很好的基础——例如在 dApp 中添加 Token 实用程序,设置空投或稍后构建完整的项目。
Token 的类型
请记住,我们将创建一个“同质化”的 SPL Token,而不是 Token2022 扩展 Token 或 NFT。同质化意味着每个 Token 都完全相同,并且可以一对一交换。
标准的同质化 SPL Token 是 Solana 上常见的 Token 类型。它就像一枚普通的Coin——每个单位与下一个单位相同。默认情况下,它没有任何花哨的功能(Token-2022 Token 具有额外的功能),但它 易于创建、易于转移,并且适用于大多数钱包和应用程序。
Token-2022 扩展 Token 更高级。它建立在与常规 Token 相同的基础上,但它可以包括 额外的功能。例如,它可以具有内置的转移规则、计息逻辑或机密转移。
NFT(Non-Fungible Token,非同质化 Token) 完全不同。它 不是同质化的,这意味着,每一个都是 独一无二的。你可以把它想象成 一张独一无二的数字交易卡,或者一张写有你名字的门票。它用于诸如 艺术品、收藏品、游戏物品或任何一个版本不应与另一个版本完全相同的事物。
让我们深入了解并从头开始创建你的第一个 Solana Token!
接下来:
- 安装、钱包和新文件
- 导入模块
- 设置 Umi + 签名者身份
- 读取和上传图像
- 创建和上传元数据 JSON
- 在链上创建 Token Mint 和元数据
- 为所有者创建一个 Token 账户
- 将 Token 铸造给自己
- 发送交易
- 显示交易和 Mint 地址
- 我转移了所有 10 亿个!!!!
- 在 Solana 主网上线的选项
- 创建 Token,完整代码
🥰感谢阅读!… 🔥 请鼓掌并分享这篇文章,谢谢!🚀
⚠️注意:我将我的 Token 创建为 IC “Idea Coin”,ic.jpg 图像,我可能会在这里提到几次,但是,显然这会根据你的输入而改变。
1. 安装、钱包和新文件
首先,安顿下来。
⚠️ 你将需要 CLI,因此如果你没有安装它,请按照我的文章进行操作:Solana 开发设置指南(第 1 部分:CLI),它是可选的,但如果你遇到问题,你可能还想查看:Solana 开发设置指南(第 2 部分:Node.js、Next.js、React)
- 我建议 启动一个新的 repo 这样你就可以保存你的工作。
- 将其克隆到你的本地系统,这样我们就可以在目录中工作。
- 使用
npm启动一个新项目。
git clone https://github.com/your-username/your-token-project.git
cd your-token-project

## start your npm project, package.json
npm init
使用 Typescript 是一种好的做法,养成一个好习惯。 虽然老实说 TS 并没有真正出现在本教程中。我将使用 .ts 扩展名,但如果你只想使用带有 .js 的 node,你可以这样做!
我在过去的教程中提到过这一点,但是你可以使用一个名为 ts-node 的工具来运行 .ts 文件,而无需额外的编译,就像你运行脚本 node script.ts 一样
npm install --save-dev ts-node typescript

## or use

npx ts-node your-script.ts
让我们也安装 dotenv,这样我们就可以将我们的 API 密钥放在 .env 文件中,这样它就是安全的,并且不会被检入我们的 repo。
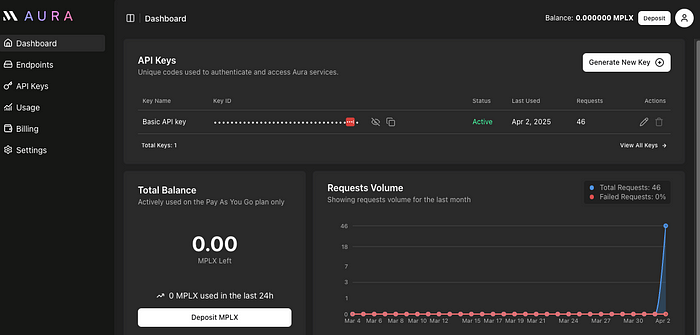
npm install dotenv转到 Metaplex Aura 网站以获取 RPC URL 和 API 密钥:
https://developers.metaplex.com/aura
创建一个.env文件并将此放入其中,并带有API密钥(按照那里的说明进行操作,将其放入URL):
UMI_RPC_URL=https://devnet-aura.metaplex.com/f5180...我们需要安装的包和我们的代码正在使用的库:
npm i @metaplex-foundation/umi
npm i @metaplex-foundation/umi-bundle-defaults
npm i @metaplex-foundation/mpl-token-metadata
npm i @metaplex-foundation/umi-uploader-irys
npm i @metaplex-foundation/mpl-toolbox
你应该创建一个钱包,先做比较容易。一些例子显示它是在脚本中完成的,但是如果出现空投问题,它会停止...
创建此目录(将目录更改为你想要的):
cd /Users/<你的用户名>/wallets使用你的文件名 my-wallet-file.json 创建一个钱包,但你可以创建自己的名称,只要你使用命令:solana-keygen new — outfile my-wallet-file.json,这无关紧要。
创建钱包:
solana-keygen new --outfile my-wallet-file.json

## Output - note: no passphrase needed, hit enter

Generating a new keypair

For added security, enter a BIP39 passphrase

NOTE! This passphrase improves security of the recovery seed phrase NOT the
keypair file itself, which is stored as insecure plain text

BIP39 Passphrase (empty for none): <empty>

Wrote new keypair to creator-token-ic.json
========================================================================
pubkey: GFY1...<snip>...4d
========================================================================
Save this seed phrase and your BIP39 passphrase to recover your new keypair:
... ... ... ... ... ... ... ... ... ... ... ...
========================================================================
复制你的公钥 a 和目录/文件名。现在将你的助记词保存在纸上(这是用于 devnet 的)。
⚠️ 你需要在下面的步骤中使用你的公钥(公钥)。
你将需要 公钥 来空投 dev SOL 或从另一个钱包转移,以及脚本中的 目录/文件名。助记词 用于你丢失密钥对钱包文件的情况。你可以使用助记词恢复。
🪂 我向我的新地址进行了空投。
✅ 如果你已经从我们之前的教程中获得了一个带有 dev SOL 的开发钱包,你可以将其转移到你的新钱包地址(上面生成的公钥)
⚠️ 首先确保你在 devnet 上:
solana config get

## output

...
RPC URL: https://api.devnet.solana.com
...
如果你不在,你可以使用以下命令设置它:
solana config set --url https://api.devnet.solana.com然后使用 solana config get 检查它
## request for your public key above
solana airdrop 2 GFY1U36<snip...public key from above>M4d

## output
Requesting airdrop of 2 SOL

Signature: 5R6.....k1Y
2 SOL
仔细检查你的余额:
solana balance /Users/<用户名>/wallets/my-wallet-file.json --url https://api.devnet.solana.com

## output (varies based on your amt.)

2 SOL
为我们的创建 Token 脚本创建一个新文件
touch create-token-umi.ts2. 导入模块
我们首先需要在文件顶部进行一些导入。
这些导入来自 Metaplex 和 Node.js 的实用程序函数和 SDK 工具以及 Token 元数据支持。
添加到文件顶部:
import {
  createFungible,
  mplTokenMetadata,
} from '@metaplex-foundation/mpl-token-metadata'
创建 Token 帐户和 Mint Token 的工具:
import {
  createTokenIfMissing,
  findAssociatedTokenPda,
  getSplAssociatedTokenProgramId,
  mintTokensTo,
} from '@metaplex-foundation/mpl-toolbox'
导入用于获取钱包、金额和设置身份的助手:
import {
  keypairIdentity,
  percentAmount,
  createGenericFile,
  sol,
} from '@metaplex-foundation/umi'
使用默认设置创建一个 Umi 实例,并通过 Irys (Arweave) 启用上传:
import { createUmi } from '@metaplex-foundation/umi-bundle-defaults'
import { irysUploader } from '@metaplex-foundation/umi-uploader-irys'
Base58 序列化器和文件系统实用程序和 dotenv:
import { base58 } from '@metaplex-foundation/umi/serializers'
import fs from 'fs'
import dotenv from "dotenv";
dotenv.config();
3. 设置 Umi + 签名者身份
- 前往 Metaplex Aura 网站获取免费 API 密钥(免费):
https://aura-app.metaplex.com/en/dashboard
- Metaplex 一直是一家 OG Solana 公司,以帮助创作者使用 Token 和 NFT 以及相关的库/标准而闻名。
代码:
- 为 Devnet 创建一个 Umi 客户端。告诉它我们正在使用 devnet、MPL Token 元数据和 irys uploader(用于我们的图像)。
- 将你的钱包设置为身份。你必须填写路径。
- 从磁盘读取你钱包的私钥。将其转换为可用的密钥对。
- 告诉 Umi 使用此密钥对作为其签名者身份。
- 注意:.env 应该与此脚本位于同一目录中, 否则请查找如何指定其他目录。
 const umi = createUmi("https://devnet-aura.metaplex.com/process.env.UMI_RPC_URL!")
  .use(mplTokenMetadata())
  .use(mplToolbox())
  .use(irysUploader())

// Load your local wallet file (keypair) from disk
const walletFile = fs.readFileSync('/Users/<用户名>/wallets/my-wallet-file.json', 'utf8');

// Convert the wallet file JSON into a Uint8Array usable as a keypair
const secretKey = new Uint8Array(JSON.parse(walletFile));
console.log("Secret key length:", secretKey.length); // Should be 64 bytes

// Generate the keypair and set it as the identity for Umi
const umiSigner = umi.eddsa.createKeypairFromSecretKey(secretKey);
umi.use(keypairIdentity(umiSigner));
4. 读取和上传图像
现在我们需要设置图像。
- 读取你的本地图像(Token 标志)。
- 将其包装成 Irys 可以理解的格式(带有 MIME 类型)。
- 这会将其上传到 Arweave,以便将其包含在元数据中。
- 为你的 Token 图像返回一个永久的、去中心化的 URL。
// Read your token image from the local file system
const imageFile = fs.readFileSync(".//name-of-your-image.jpg");

// Wrap the image in a format Umi understands, and set the correct MIME type
const umiImageFile = createGenericFile(imageFile, "my-coin-image.jpg", {
  tags: [{ name: "Content-Type", value: "image/jpeg" }],
});

// Upload the image to Arweave via Irys and get the hosted URL
console.log("Uploading image to Arweave via Irys");
const imageUri = await umi.uploader.upload([umiImageFile]).catch((err) => {
  throw new Error(err);
});
console.log(imageUri[0]);
🥰感谢阅读!… 🔥 请鼓掌并分享这篇文章,谢谢!🚀
5. 创建和上传元数据 JSON
- 定义和上传元数据,包括名称、符号、描述和图像 URI。
- 元数据为你的 Token 提供可读的身份——对钱包、浏览器和 dApp 很有用。这是你在钱包中看到的内容。
// Define metadata for your token, including image and description
const metadata = {
    name: "Your Coin Name",
    symbol: "SYMBOL",
    description: "This Coin is a token created on the Solana Devnet",
    image: imageUri[0],
  };

// Upload the metadata to Arweave via Irys
console.log("Uploading metadata to Arweave via Irys");
const metadataUri = await umi.uploader.uploadJson(metadata).catch((err) => {
  throw new Error(err);
});
6. 在链上创建 Token Mint 和元数据
- 为 Token Mint 生成一个新的密钥对。
- 调用
createFungible注册一个带有元数据的新 Token。
// Create a new signer to act as the mint authority for the token
const mintSigner = generateSigner(umi);

// Create a new fungible token on Solana using the uploaded metadata
 const createFungibleIx = createFungible(umi, {
   mint: mintSigner,
   name: "Your Coin Name",
   uri: metadataUri,
   sellerFeeBasisPoints: percentAmount(0), // No royalties
   decimals: 5, // Sets token precision to 5 decimal places
 });
7. 为所有者创建一个 Token 账户
- 为你创建一个关联的 Token 账户来持有 Token。
- 你需要一个“Token 银行账户”才能实际接收 Mint 的 Token。
// Create an associated token account for the owner (if it doesn't already exist)
const createTokenIx = createTokenIfMissing(umi, {
  mint: mintSigner.publicKey,
  owner: umi.identity.publicKey,
  ataProgram: getSplAssociatedTokenProgramId(umi),
});
8. 将 Token 铸造给自己
现在我们需要 Mint Token。前一步我们只是创建了 Token,但我们实际上还没有 Mint 它。这就是这一步的目的。
- 将你的 SYMBOL(例如,在我的例子中为 IC)Token Mint 到你的 Token 账户。
- 你已经创建了 Token——但现在你正在将供应量发行到你的钱包中。
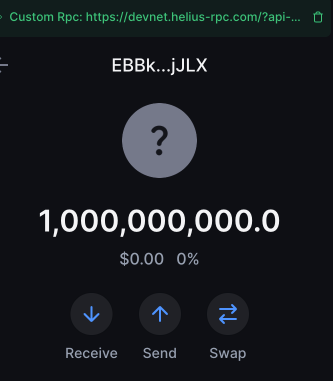
- decimals: 5 意味着在链上,你的 Token 以“微单位”运行,例如 100,000 = 1.00000。
- 你 Mint 了 100 万亿个微单位,相当于 1,000,000,000.00000 个 Token。
// Mint 1 billion tokens (with 5 decimals) to the owner's token account
const mintTokensIx = mintTokensTo(umi, {
  mint: mintSigner.publicKey,
  token: findAssociatedTokenPda(umi, {
    mint: mintSigner.publicKey,
    owner: umi.identity.publicKey,
  }),
  amount: BigInt(1_000_000_000 * 10 ** 5), // 1,000,000,000.00000 tokens
});
🚀 9. 发送交易
- 将所有三个指令合并为一个事务并发送它。
- S olana 是原子的——你可以将多个步骤批量处理在一起以提高可靠性。
// Send the transaction with all the above instructions combined
console.log("Sending transaction");
const tx = await createFungibleIx
  .add(createTokenIx)
  .add(mintTokensIx)
  .sendAndConfirm(umi);
🔗 10. 显示交易和 Mint 地址
- 记录到交易和你新的 Token Mint 的链接。
- 你可以验证 Token 是否存在并 Mint 到你的钱包中。
// Deserialize and log the transaction signature for on-chain verification
const signature = base58.deserialize(tx.signature)[0];

console.log('\nTransaction Complete');
console.log('View Transaction on Solana Explorer');
console.log(`https://explorer.solana.com/tx/${signature}?cluster=devnet`);
console.log('View Token on Solana Explorer');
console.log(`https://explorer.solana.com/address/${mintSigner.publicKey}?cluster=devnet`);
};

// execute script
createAndMintTokens();
10. 执行我们的 Token 脚本
让我们首先检查一次余额:
solana balance /Users/<用户名>/wallets/creator-token-ic.json --url https://api.devnet.solana.com

## output (varies based on your amt.)

2 SOL
好的,我们很好。
✅ 准备好起飞了吗?LFG!🚀🤣👽
ts-node create-token-umi.ts
## if using a .js extension you can use "node create-token-umi.js"

## output

Secret key length: 64
Uploading image to Arweave via Irys
https://gateway.irys.xyz/GpzHXsj<snip>15mW2
Uploading metadata to Arweave via Irys
Sending transaction

Transaction Complete
View Transaction on Solana Explorer
https://explorer.solana.com/tx/5CoKkM<snip>MQcHy3QoJz7yG?cluster=devnet
View Token on Solana Explorer
https://explorer.solana.com/address/EBBkutAdh<snip>SXajJLX?cluster=devnet
✅ 我们成功了!!!
老实说,我当时想……
“伙计……希望这能奏效,这样我才能完成这篇文章!!!!”
……就像,它确实奏效了!
这只是创建 Token 的一种方法! 你不需要使用 Aura。我以前在有和没有 umi 以及没有 Aura 的情况下都这样做过,也许我会更新这篇文章并在某个时候提供各种其他方法。但是这很简单而且是免费的。我真的几乎没花时间向你展示!
🥰感谢阅读!… 🔥 请鼓掌并分享这篇文章,谢谢!🚀
事实上,创建 Token 现在将成为你正常的日常活动。如果你变成了一个真正的“degen”,不要怪我 🤣 我会告诉所有人你已经是了,因为你已经读完了这篇文章!🤣 🚀
Solana Explorer (Solana 区块浏览器): https://explorer.solana.com/address/EBBkutAdhhTp7JD7ydiJAQfXPEwdk87wcnHhFSXajJLX?cluster=devnet
❌ 但是我们真的完成了!没有!… 还有一个步骤….
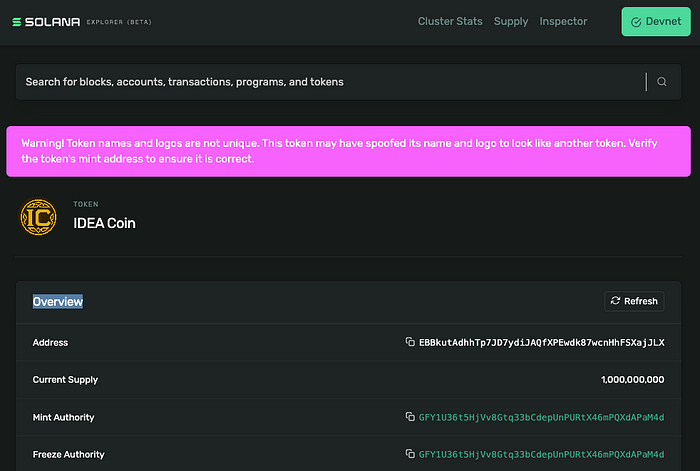
检查 Solana Explorer 上的“元数据”选项卡:

你需要将此发送给你所有的朋友!
你正在成为一名专家。
首先有几种方法可以检查你的余额。
使用 CLI 检查余额
spl-token accounts --owner <公钥>
spl-token accounts --owner <你的公钥>

## example wth my public key (remember: not secret, it's my public address)

spl-token accounts --owner GFY1U36t5HjVv8Gtq33bCdepUnPURtX46mPQXdAPaM4d

## output

Token                                         Balance
--------------------------------------------------------
EBBkutAdhhTp7JD7ydiJAQfXPEwdk87wcnHhFSXajJLX  1000000000
现在让我们转移它。
我们需要 Mint 地址。
为了消除困惑……Mint 地址 vs. Mint 授权
Mint 地址: 这是Token(Mint)本身的公钥。这是我们想要的。
- 这是你用于检查余额、转移 Token 或通过 spl-token CLI 或脚本与 Token 交互的地址。
- 在你的脚本中,这对应于 mintSigner.publicKey。
- 在Token页面的截图中,它被称为
"address" EBBkutAdhhTp7JD7ydiJAQfXPEwdk87wcnHhFSXajJLX - 在浏览器中的元数据中:
“mint”: string”EBBkutAdhhTp7JD7ydiJAQfXPEwdk87wcnHhFSXajJLX”
Mint 授权: 这是有权Mint新Token的帐户的公钥。
- 它在创建Token时设置,如果未指定其他授权,则可以与你钱包的公钥(来自creator-token-ic.json)相同。
- 可以撤销Mint授权(设置为null) 以使Token供应固定,但这是可选的,与转移Token无关。
我们想要转移, 请注意,我正在使用我的Mint地址,你的地址将不同:
## With the transfer command we want to set our wallet holding the tokens
## as the local default wallet.
solana config set --keypair /Users/用户名/wallets/creator-token-ic.json
## All 1 Billion
## spl-token transfer --fund-recipient EBBkutAdhhTp7JD7ydiJAQfXPEwdk87wcnHhFSXajJLX 1000000000 <DEST_PUBLIC_KEY>
## 2 million
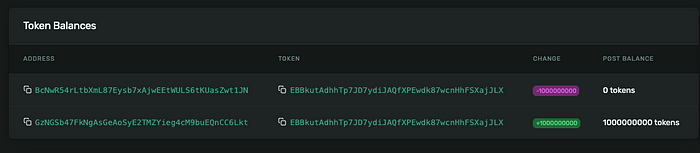
spl-token transfer --fund-recipient EBBkutAdhhTp7JD7ydiJAQfXPEwdk87wcnHhFSXajJLX 2000000 <DEST_PUBLIC_KEY>11. 我转移了所有 10 亿个!!!!
输出:
Transfer 1000000000 tokens
  Sender: BcNwR54r<snip>S6tKUasZwt1JN
  Recipient: 9sLgc<snip>A9WfkQPE
  Recipient associated token account: GzNGSb47FkN<snip>4cM9buEQnCC6Lkt
  Funding recipient: GzNGSb47FkNgAsGe<snip>cM9buEQnCC6Lkt

Signature: 5kLP7JEAqYX9K3bGisbKMjeKZEn16yoDKxYcbogGKE39s595kfd4NHsjFJYge3TNVymBMMKqqGXkM2cK46dMEBzi
也许你最好只做上面 200 万。你的选择。🤣
Solana Explorer devnet 上的交易:
接收者钱包(不在 devnet 上的 Backpack 钱包上显示图像)
另一次转移,我们看到了小数:
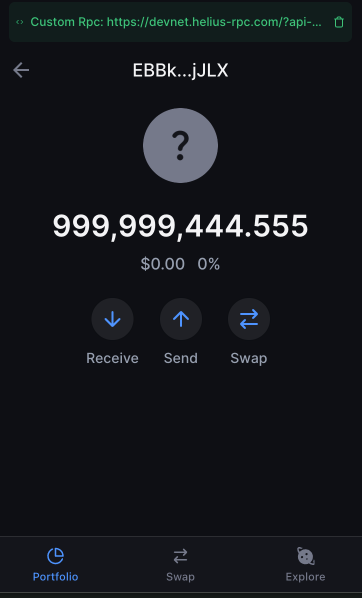
哇,那太酷了。
我们完成了什么:
- ✅ 钱包设置。 加载了你的本地密钥对并用它来签署交易。
- ✅ 空投。 用 Devnet 上的免费 SOL 资助了你的钱包。
- ✅ 图像上传。 将图像上传到 Arweave。
- ✅ 元数据上传。 创建并托管了Token元数据JSON。
- ✅ Mint 设置。 在 Solana 上创建了一个新 Token。
- ✅ Mint。 Mint 了 10 亿个Token。
- ✅ 浏览器链接。 在 Solana Explore 上实时查看了所有内容。
- ✅ 转移到另一个钱包。
- ✅ 查看了交易。
12. 在 Solana 主网上线的选项
如果你想进入主网并在那里启动,你可以这样做!我不会在这里详细介绍所有内容,我会留给你!
但是,要在 Solana 上进行实时生产主网的一般列表:
- 切换 RPC 端点:将 Umi 端点从
https://devnet-aura.metaplex.com/<你的 api key>更新到 Mainnet RPC,例如https://api.mainnet-beta.solana.com或付费提供商(例如,Helius 或 QuickNode)以获得可靠性。
Devnet 使用测试网络;Mainnet 是实时区块链。
- 用真正的 SOL 资助钱包:将 Devnet 空投替换为你钱包中已有的或从交易所(Coinbase、Binance)购买并发送到你的主网钱包公钥的实际 SOL。
Devnet SOL 是免费的;Mainnet SOL 具有实际价值并花费真金白银。
- 更新浏览器链接:将 Solana Explorer URL 中的
?cluster=devnet参数更改为?cluster=mainnet-beta(或删除它,因为 Mainnet 是默认设置)。
Devnet 链接指向测试数据;Mainnet 链接显示实时交易。
- 首先在 Devnet 上进行测试:在 Mainnet 上彻底测试脚本,以避免在错误上浪费实际 SOL。
Devnet 是一个沙盒;Mainnet 交易是不可逆转的。
- 调整费用和成本:考虑实际交易费用和 Arweave 上传成本(以 SOL 支付),这些费用在 Devnet 上可以忽略不计,但在 Mainnet 上是真实的。
Devnet 费用是免费的;Mainnet 需要实际的 SOL 支付。
- 安全密钥对:确保你的 json 密钥对已备份并安全存储,因为 Mainnet 交易涉及实际资产。理想情况下,你应该为生产主网使用新的密钥对/钱包,这可以避免混淆什么是 dev SOL 和 live SOL。
Devnet 损失是微不足道的;Mainnet 损失是永久的,是真金白银。
将会有更多的教程。请继续关注此处的新教程。坚持下去!
13. 创建 Token,完整代码:
✅ ⚠️ 确保填写你自己的信息,例如钱包文件名/目录、图像文件名等。
import {
createFungible,
mplTokenMetadata,
} from "@metaplex-foundation/mpl-token-metadata";
import {
createTokenIfMissing,
findAssociatedTokenPda,
getSplAssociatedTokenProgramId,
mintTokensTo,
mplToolbox,
} from "@metaplex-foundation/mpl-toolbox";
import {
generateSigner,
keypairIdentity,
percentAmount,
createGenericFile,
signerIdentity,
sol,
} from "@metaplex-foundation/umi";
import { createUmi } from "@metaplex-foundation/umi-bundle-defaults";
import { irysUploader } from "@metaplex-foundation/umi-uploader-irys";
import { base58 } from "@metaplex-foundation/umi/serializers";
import fs from "fs";
import dotenv from "dotenv";
dotenv.config();
const createAndMintTokens = async () => {
const umi = createUmi(
"https://devnet-aura.metaplex.com/<你的 api key>"
)
.use(mplTokenMetadata())
.use(mplToolbox())
.use(irysUploader());
// Load your local wallet file (keypair) from disk
const walletFile = fs.readFileSync(
"/Users/<用户名>/wallets/my-wallet-file.json",
"utf8"
);
// Convert the wallet file JSON into a Uint8Array usable as a keypair
const secretKey = new Uint8Array(JSON.parse(walletFile));
console.log("Secret key length:", secretKey.length); // Should be 64 bytes
// Generate the keypair and set it as the identity for Umi
const umiSigner = umi.eddsa.createKeypairFromSecretKey(secretKey);
umi.use(keypairIdentity(umiSigner));
// Read your token image from the local file system
// you can you png but must change the mimetype also below
const imageFile = fs.readFileSync(".//name-of-your-image.jpg");
// Wrap the image in a format Umi understands, and set the correct MIME type
const umiImageFile = createGenericFile(imageFile, "ic.jpg", {
tags: [{ name: "Content-Type", value: "image/jpeg" }],
});
// Upload the image to Arweave via Irys and get the hosted URL
console.log("Uploading image to Arweave via Irys");
const imageUri = await umi.uploader.upload([umiImageFile]).catch((err) => {
throw new Error(err);
});
console.log(imageUri[0]);
// Define metadata for your token, including image and description
const metadata = {
name: "Your Coin Name",
symbol: "SYMBOL",
description: "This Coin is a token created on the Solana Devnet",
image: imageUri[0],
};
// Upload the metadata to Arweave via Irys
console.log("Uploading metadata to Arweave via Irys");
const metadataUri = await umi.uploader.uploadJson(metadata).catch((err) => {
throw new Error(err);
});
// Create a new signer to act as the mint authority for the token
const mintSigner = generateSigner(umi);
// Create a new fungible token on Solana using the uploaded metadata
const createFungibleIx = createFungible(umi, {
mint: mintSigner,
name: "Your Coin Name",
uri: metadataUri,
sellerFeeBasisPoints: percentAmount(0), // No royalties
decimals: 5, // Sets token precision to 5 decimal places
});
// Create an associated token account for the owner (if it doesn't already exist)
const createTokenIx = createTokenIfMissing(umi, {
mint: mintSigner.publicKey,
owner: umi.identity.publicKey,
ataProgram: getSplAssociatedTokenProgramId(umi),
});
// Mint 1 billion tokens (with 5 decimals) to the owner's token account
const mintTokensIx = mintTokensTo(umi, {
mint: mintSigner.publicKey,
token: findAssociatedTokenPda(umi, {
mint: mintSigner.publicKey,
owner: umi.identity.publicKey,
}),
amount: BigInt(1_000_000_000 * 10 ** 5), // 1,000,000,000.00000 tokens
});
// Send the transaction with all the above instructions combined
console.log("Sending transaction");
const tx = await createFungibleIx
.add(createTokenIx)
.add(mintTokensIx)
.sendAndConfirm(umi);
// Deserialize and log the transaction signature for on-chain verification
const signature = base58.deserialize(tx.signature)[0];
console.log("\nTransaction Complete");
console.log("View Transaction on Solana Explorer");
console.log(
`https://explorer.solana.com/tx/${signature}?cluster=devnet`
);
console.log("View Token on Solana Explorer");
console.log(
`https://**推广:我的云电子书商店**——以超值的价格提供出色的云架构师和工程书籍,“云指标”(800+ 页)和“云审计”(800+ 页)等——[https://store.systemsarchitect.io](https://store.systemsarchitect.io/)
**35%** **折扣** **折扣码:35BLOG2025** 在结账时使用
[](https://store.systemsarchitect.io/) [https://store.systemsarchitect.io](https://store.systemsarchitect.io/)
## 关于我
我是一名云架构师、高级开发人员和技术负责人,喜欢用创新的解决方案解决高价值的挑战。
我总是乐于讨论项目。如果你在项目上需要帮助,或者有机会,或者只是想聊聊云问题,你可以通过 csjcode at gmail 联系我。
[**每当 Chris St. John 发布文章时,都会收到一封电子邮件。** \\
\\
**每当 Chris St. John 发布文章时,都会收到一封电子邮件。注册即表示你将创建一个 Medium 帐户(如果你还没有……)**\\
\\
medium.com](https://medium.com/@csjcode/subscribe?source=post_page-----54eb4e6ddb27---------------------------------------)
**我在 Medium 上的最新文章:** [https://medium.com/@csjcode](https://medium.com/@csjcode)
**云成本节约:** [https://medium.com/cloud-cost-savings](https://medium.com/cloud-cost-savings)
**云架构师评论:** [https://medium.com/cloud-architect-review](https://medium.com/cloud-architect-review)
**AI 开发技巧:** [https://medium.com/ai-dev-tips](https://medium.com/ai-dev-tips)
**API 开发技巧:** [https://medium.com/api-dev-tips](https://medium.com/api-dev-tips)
**Solana 开发技巧:** [https://medium.com/solana-dev-tips](https://medium.com/solana-dev-tips)
**我已经在软件开发领域工作了 20 多年**,既有像 NIKE 和最初的 MP3.com 这样的**企业**环境,也有像 FreshPatents、SystemsArchitect.io、API.cc 和 Instantiate.io 这样的**初创公司**。
我的经验范围包括**云电子商务、API 设计/实现**、serverless、用于开发的 **AI 集成**、内容管理、**前端 UI/UX 架构**和登录/身份验证。 我会为软件架构设计提供技术讲座、教程并分享文档。 并且之前持有 AWS 解决方案架构师认证。
**推广:我的云电子书商店**——以超值的价格提供出色的云架构师和工程书籍,“云指标”(800+ 页)和“云审计”(800+ 页)等——[https://store.systemsarchitect.io](https://store.systemsarchitect.io/)
**35%** **折扣** **折扣码:35BLOG2025** 在结账时使用
>- 原文链接: [medium.com/solana-dev-ti...](https://medium.com/solana-dev-tips/create-a-token-on-solana-with-node-js-and-metaplex-umi-54eb4e6ddb27)
>- 登链社区 AI 助手,为大家转译优秀英文文章,如有翻译不通的地方,还请包涵~


